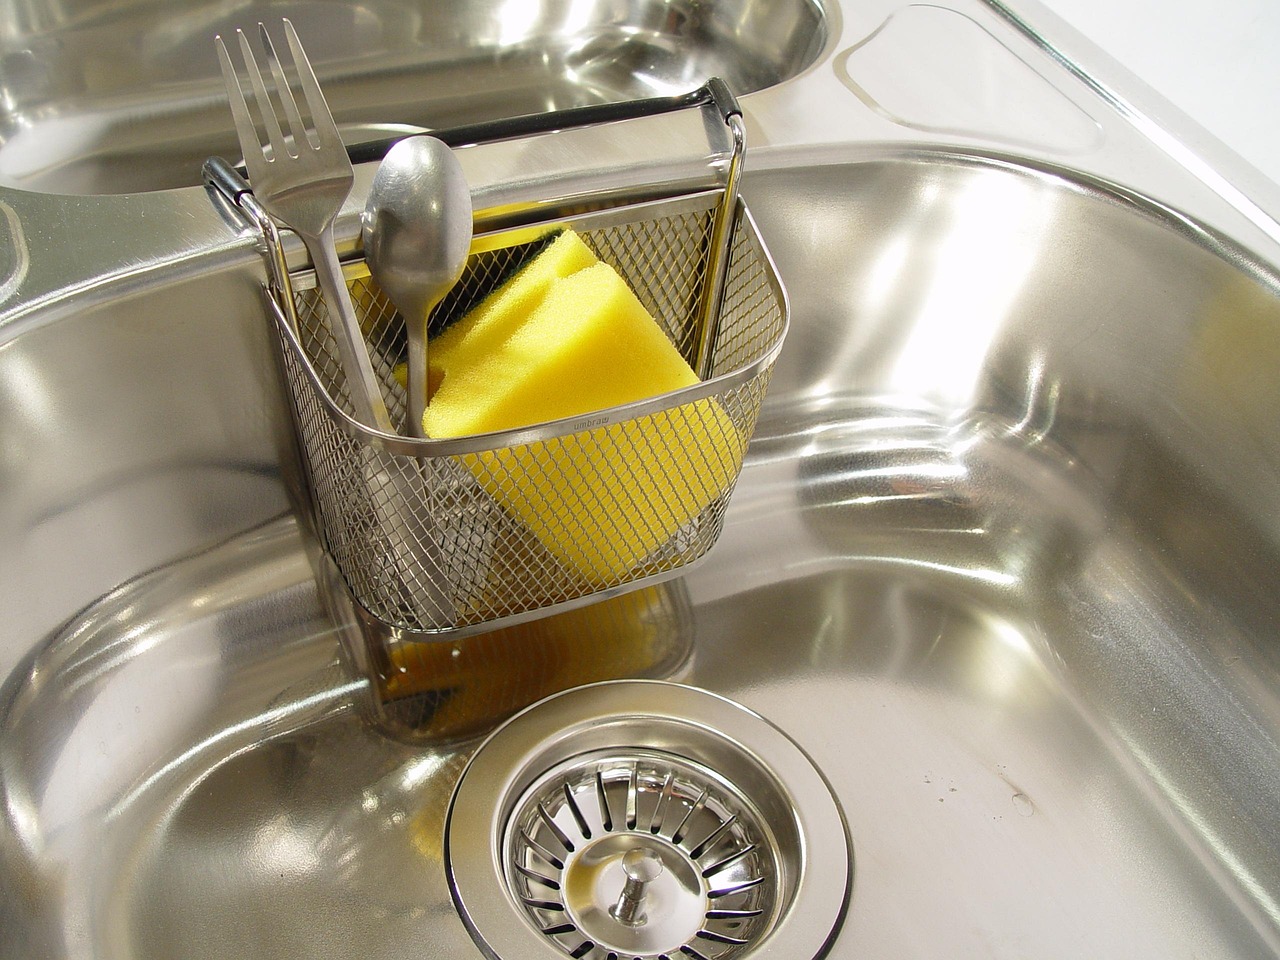
How to Unclog a Kitchen Sink at Home (6 Easy Fixes)
A blocked kitchen sink is something almost every household deals with at some point. Whether you live in an apartment, a family home, or a rented flat, the kitchen drain works hard every single day. Over time, grease from cooking, soap residue, coffee grounds, food scraps, starchy water from rice or pasta, and even small bits of vegetable peels slowly collect inside the pipe. At first, you may only notice water draining a little slower than usual. Then one day, the sink stops draining completely and you’re left with standing, dirty water that refuses to move.
Most kitchen sink clogs don’t happen suddenly. They build up layer by layer inside the drainpipe, especially when oil and grease cool down and harden. That sticky layer traps more debris, which makes the blockage worse. The good news is that you usually don’t need expensive tools, harsh chemicals, or emergency plumbing services to unclog your kitchen sink. In many cases, simple home remedies can break down buildup and restore normal water flow within minutes.
Before you reach for chemical drain cleaners or call a plumber, try these 6 easy and practical hacks to safely unclog your kitchen sink and get your drain flowing smoothly again.
1. Hot Water Flush – The Simplest Way to Start
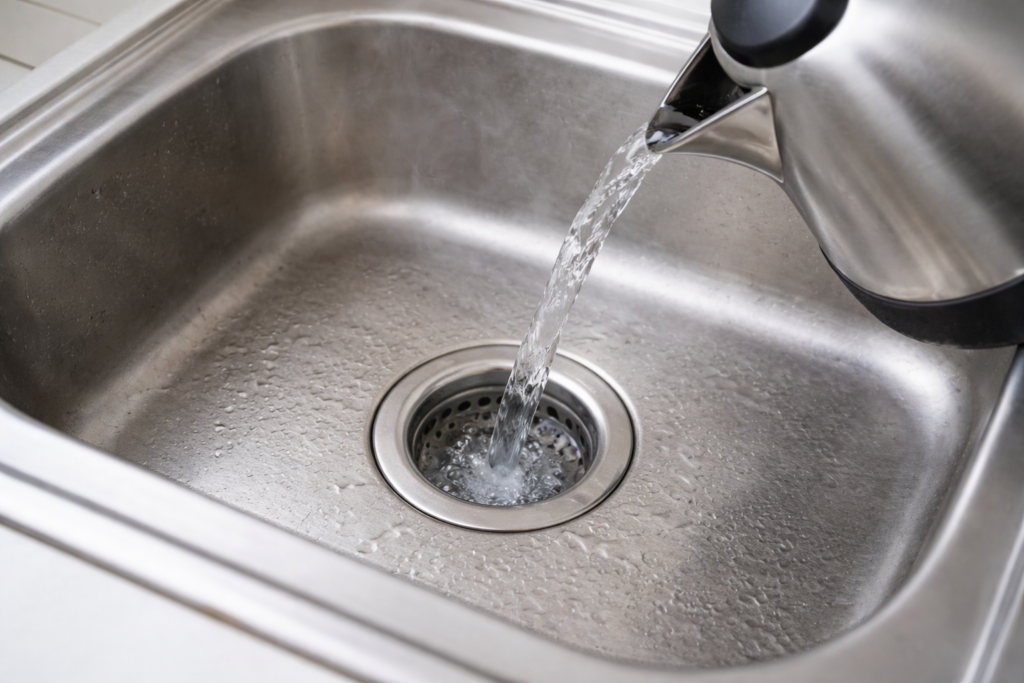
Before trying anything complicated, begin with the most basic method. A hot water flush is often enough to unclog a kitchen sink that is draining slowly or partially blocked. In many homes, the main cause of minor clogs is grease and oil that has cooled and hardened inside the pipe. When you wash dishes, warm grease flows down easily, but as it cools, it sticks to the inner walls of the drain. Over time, this sticky layer traps food particles and soap residue, creating a blockage.
Hot water works by softening and loosening that greasy buildup so it can move further down the pipe.
How to do it properly:
• Heat about 1 to 2 liters of water until it is very hot.
• If you have metal pipes, you can use boiling water.
• If your plumbing is PVC or plastic, avoid fully boiling water. Use very hot tap water instead to prevent pipe damage.
• Slowly pour the water into the drain in two or three stages rather than all at once.
• Wait for a few minutes, then run regular tap water to see if the flow improves.
If the sink is completely filled with standing water, remove as much as possible first using a mug or bowl. This allows the hot water to directly reach the clog instead of cooling on the surface.
This method is safe, chemical-free, and worth trying before moving to stronger unclog solutions. For light grease buildup, it can restore normal drainage within minutes.
2. Baking Soda + Vinegar Fizz – A Natural Way to Unclog Your Kitchen Sink

If hot water alone doesn’t fix the problem, the baking soda and vinegar method is one of the most trusted natural ways to unclog a kitchen sink. This simple reaction has been used for years because it is affordable, widely available, and safe for most household plumbing systems when used correctly.
Kitchen sink clogs often form from organic material like food particles, grease residue, and soap scum. Baking soda, also known as sodium bicarbonate, is mildly alkaline. Vinegar is acidic. When combined, they create a bubbling reaction that helps loosen debris stuck inside the drainpipe. While the fizzing action does not “explode” clogs away like some people think, it can help break down soft buildup and push it further through the pipe.
Here’s how to do it properly for the best results:
First, remove any standing water from the sink. This step is important because it allows the ingredients to directly reach the blockage instead of getting diluted.
Pour about one cup of baking soda directly into the drain. Try to get as much of it inside the pipe as possible. You can use a spoon or funnel if needed.
Next, slowly pour one cup of white vinegar into the drain. You will immediately notice fizzing and bubbling. Cover the drain with a plug or cloth to keep the reaction inside the pipe rather than coming back up.
Let the mixture sit for at least 15 to 20 minutes. For tougher buildup, you can leave it for up to 30 minutes.
After waiting, flush the drain with hot water to wash away the loosened debris.
This method works best for minor to moderate clogs caused by organic waste. It is safer than harsh chemical drain cleaners, which can damage pipes over time and pose health risks. However, if your sink is completely blocked or the clog keeps returning, the issue may be deeper in the plumbing system and require mechanical cleaning or professional inspection.
Used occasionally as maintenance, this natural method can help keep your kitchen drain flowing smoothly.
3.Use a Drain Snake or Wire Hook to Pull Out the Blockage
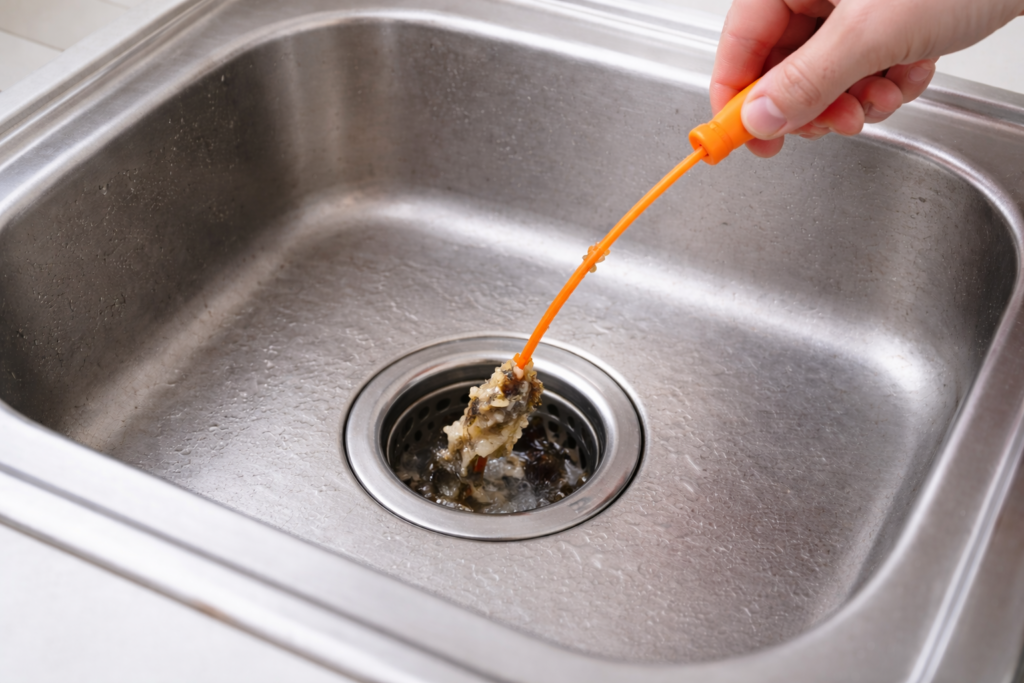
When your kitchen sink is completely blocked and water refuses to drain at all, the problem is often a solid obstruction sitting inside the pipe. Unlike grease buildup that can soften with heat, solid debris needs to be physically removed. Food scraps, fibrous vegetable peels, rice clumps, coffee grounds, and even small objects can create a tight blockage that no liquid solution will fully clear.
This is where a drain snake or a simple wire hook becomes extremely effective.
A drain snake is a flexible tool designed to travel through pipes and latch onto debris. You can find affordable plastic versions at most hardware stores. If you do not have one, a metal coat hanger can work as an alternative. Straighten the hanger and create a small hook at one end. Make sure the tip is not too sharp to avoid damaging the pipe.
Before starting, remove any visible standing water from the sink using a cup or small container. Take out the sink strainer or stopper so you have direct access to the drain opening.
Carefully insert the drain snake or hooked wire into the pipe. Push it down slowly until you feel resistance. That resistance usually indicates the location of the clog. Gently rotate and twist the tool to grab onto the debris. Avoid forcing it aggressively, as pushing too hard may compact the blockage further.
Once you feel it catch onto something, slowly pull the tool back up. In many cases, you will see a mass of food particles and residue attached to it. Dispose of the debris in the trash, not back into the sink.
Repeat the process a few times to ensure you have removed as much material as possible. Afterward, run warm water to check if the drainage has improved.
This method is especially useful when the clog is located near the top section of the pipe. However, if the tool goes deep without pulling anything out and the sink remains blocked, the obstruction may be further down in the plumbing system.
As a precaution, avoid using excessive force and never combine this method immediately after pouring strong chemical cleaners, as splashing can be dangerous.
For many homeowners, this simple mechanical approach solves the issue quickly and restores normal water flow without the need for professional help.
4. Use a Plunger to Create Pressure and Break the Blockage
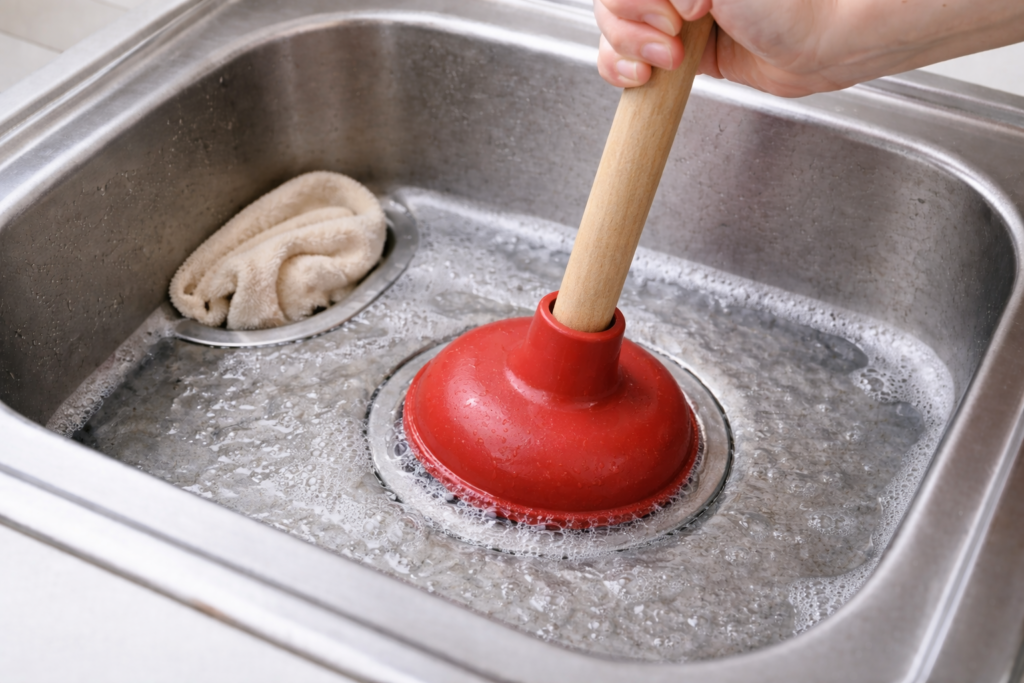
If your sink is still clogged after trying hot water or manual removal, a plunger can apply the pressure needed to shift the blockage. This method works especially well for clogs sitting deeper in the pipe where simple home mixtures cannot reach.
A sink plunger creates suction and pressure inside the drain. That push and pull motion helps loosen debris and move it through the plumbing line.
What You’ll Need:
• A standard cup-style plunger
• Water in the sink (enough to cover the rubber cup)
• A wet cloth or stopper (for double sinks)
Step-by-Step Instructions:
• Remove visible debris from the sink before starting.
• Add water if the sink is empty. The rubber cup must be fully submerged to create strong suction.
• If you have a double-bowl sink, seal the second drain opening with a wet cloth to prevent air from escaping.
• Place the plunger directly over the drain and press down gently to remove trapped air.
• Begin plunging with steady up-and-down motions. Do not lift the plunger completely off the drain.
• Perform 15 to 20 controlled pumps, then pause and check if water begins draining.
• Repeat the process if needed.
Signs It’s Working:
• You may hear a gurgling sound.
• Water may suddenly drain faster.
• The water level may drop quickly after a few plunges.
Important Tips:
• Do not plunge aggressively. Too much force can loosen pipe joints under the sink.
• Avoid using a plunger immediately after pouring chemical cleaners into the drain. Splashing can cause injury.
• Make sure the seal around the plunger is tight. Without a proper seal, pressure will escape and the method won’t work effectively.
Plunging is simple but powerful. In many cases, it clears moderate blockages within minutes. If the sink remains fully clogged after several attempts, the obstruction may be located further down the plumbing system and require deeper cleaning methods.
5. Remove and Clean the P-Trap Under the Sink for Deep Blockages
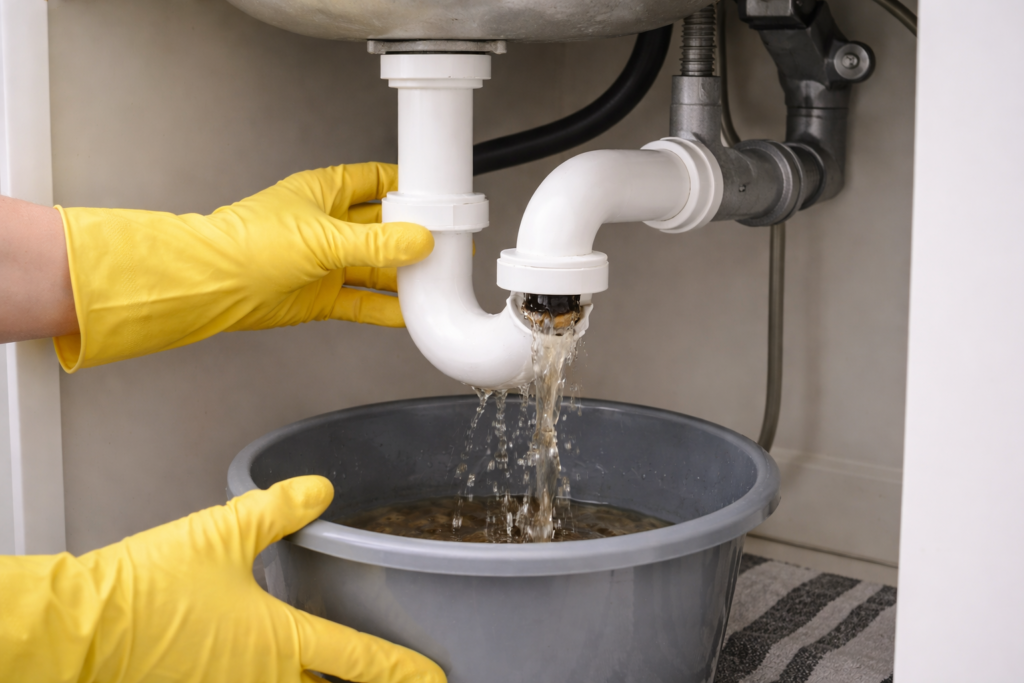
If none of the previous methods have worked, the blockage may not be near the surface. Many stubborn clogs sit inside the P-trap, the curved pipe located directly beneath your kitchen sink. This U-shaped section is designed to hold a small amount of water, which prevents sewer gases from entering your home. However, because of its curved shape, it is also a common place for debris to collect.
Grease, food scraps, soap residue, and even small objects can settle inside this bend over time. When buildup becomes thick enough, water flow slows down or stops completely.
Cleaning the P-trap may sound intimidating, but it is often simpler than people expect.
What You’ll Need:
• A bucket or large bowl
• Old towels or rags
• Rubber gloves
• Adjustable pliers (if fittings are tight)
Step-by-Step Instructions:
• First, place a bucket directly under the P-trap. When you remove the pipe, trapped water and debris will spill out.
• Put on gloves to protect your hands.
• Locate the slip nuts on both ends of the curved pipe. These connectors usually twist off by hand, but pliers can help if they are tight.
• Slowly loosen the nuts and carefully detach the P-trap.
• Allow the water and debris to drain into the bucket.
• Inspect the inside of the pipe. In many cases, you’ll find a thick buildup of grease or compacted food waste.
• Use a bottle brush, old toothbrush, or similar tool to scrub the inside thoroughly.
• Rinse the pipe with warm water before reinstalling it.
Once clean, reconnect the P-trap and tighten the fittings securely, but avoid over-tightening. After reassembly, run water through the sink and check for leaks.
This method directly removes the source of the blockage rather than pushing it deeper into the plumbing system. It is especially effective when water drains slowly despite trying plunging or snaking.
If you remove the P-trap and find it clear, the clog may be located further down the drain line. In that situation, a longer drain auger or professional assistance may be required.
Cleaning the P-trap is one of the most reliable DIY solutions for deep kitchen sink clogs. With basic tools and careful handling, many homeowners can restore proper drainage in less than an hour.
6. Use a Drain Auger for Deep or Stubborn Clogs in the Pipe
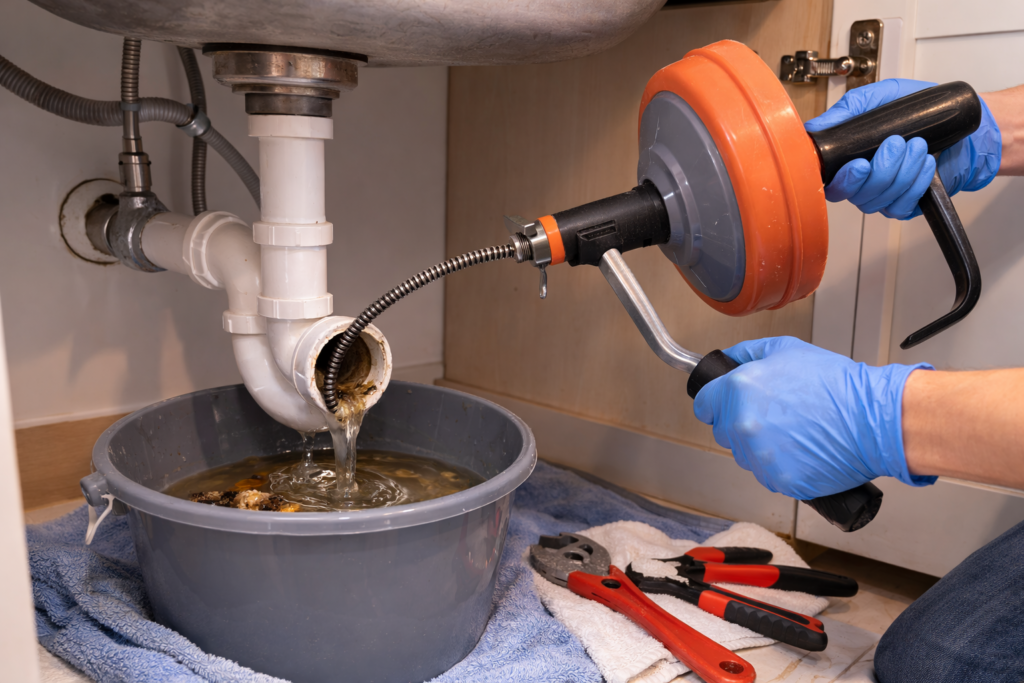
If your kitchen sink is still not draining after trying hot water, plunging, and cleaning the P-trap, the clog is likely sitting deeper inside the drain line. At this stage, a drain auger can be one of the most effective tools you can use. Unlike a small plastic snake, a drain auger is longer, stronger, and designed to reach several feet into the pipe.
A drain auger consists of a flexible metal cable coiled inside a drum with a handle attached. When you turn the handle, the cable extends further into the pipe while rotating. This motion allows the tip to either break apart the blockage or hook onto it so you can pull it out.
Before starting, place a bucket or towel under the sink area to catch any drips. Wear gloves for hygiene and grip. If you have already removed and cleaned the P-trap, it is often easier to insert the auger directly into the exposed pipe instead of through the sink opening.
Insert the end of the auger slowly into the drainpipe. Push it in gently until you feel resistance. That resistance usually indicates you’ve reached the clog. At that point:
• Tighten the locking mechanism on the auger (if your model has one).
• Turn the handle clockwise while applying light forward pressure.
• Allow the rotating cable to dig into or break through the blockage.
• Continue feeding the cable further if it moves forward easily.
If you feel the cable grab onto something, carefully pull it back while continuing to rotate. You may remove compacted debris attached to the end.
Avoid forcing the auger aggressively. Excess pressure can scratch or damage older pipes. Controlled movement works better than speed.
After retracting the auger, run warm water through the drain to test whether the blockage has cleared. If water flows freely, the clog has likely been removed. If drainage improves but remains slow, repeat the process once more.
This method is particularly useful for recurring clogs that return despite regular cleaning. It reaches beyond the visible plumbing and addresses buildup that forms further down the line.
However, if the auger cannot pass through the pipe or the blockage feels solid and immovable, the issue may involve a collapsed pipe, heavy scale buildup, or a problem in the main sewer line. In such cases, professional equipment may be required.
For deep, stubborn clogs, a drain auger offers one of the most reliable DIY solutions before calling a plumber.
How to Prevent Kitchen Sink Clogs and Keep Your Drain Running Smoothly
Fixing a clogged sink is one thing. Preventing it from happening again is even better. Most kitchen drain problems build up slowly over time, which means small daily habits can make a big difference. By following a few simple practices, you can reduce the risk of future blockages and keep your plumbing working properly.
Here are practical steps that actually help:
1. Never Pour Grease or Oil Down the Drain
Cooking oil, butter, and fat may look harmless in liquid form, but once they cool inside the pipe, they harden and stick to the walls. Instead of pouring grease into the sink, let it cool and dispose of it in the trash.
2. Use a Sink Strainer
A simple metal or silicone drain strainer can catch food scraps before they enter the pipe. Empty it regularly to prevent buildup. This small tool can significantly reduce the chance of solid debris causing a blockage.
3. Run Hot Water After Washing Dishes
After cleaning greasy cookware, let hot water run for 20 to 30 seconds. This helps move leftover residue further down the line before it sticks to the pipe walls.
4. Avoid Putting Problem Foods in the Drain
Certain items are known to cause trouble, including:
Coffee grounds
Rice and pasta
Eggshells
Flour
Fibrous vegetable peels
These materials can expand, clump together, or stick inside the plumbing.
5. Clean the Drain Regularly
Once a month, flush the drain with hot water to clear minor buildup. Regular maintenance prevents small residue layers from turning into stubborn clogs.
6. Pay Attention to Early Warning Signs
If water starts draining slower than usual or you hear gurgling sounds, address the issue early. Small blockages are easier to fix than fully clogged pipes.
Preventive care takes only a few minutes but can save you from messy backups and costly plumbing repairs. With consistent habits, your kitchen sink can stay clear and functional for years without major issues.
When to Call a Plumber for a Clogged Kitchen Sink
Most sink clogs can be handled at home with simple tools and a little patience. But there comes a point where continuing to try DIY fixes can do more harm than good. If you’ve tried hot water, plunging, cleaning the P-trap, and even using an auger, and the sink still won’t drain properly, it may be time to step back.
One clear sign is when the clog keeps coming back. If the sink works for a few days and then blocks again, the real problem is probably deeper in the drain line. You might also notice water backing up into the sink when you run the dishwasher or use another fixture. That usually means the blockage isn’t just local, it could be affecting the main line.
Persistent bad odors that don’t improve after cleaning can also signal a deeper issue. And if you start hearing loud gurgling noises from the pipes or see water pooling under the sink, it’s better not to ignore it.
A professional plumber has specialized tools that reach further and diagnose problems accurately. Calling one at the right time can prevent pipe damage, leaks, or more expensive repairs later.